How to apply glass veil on drywall joints
Team VELOBOX · Last updated 10 July 2026 · 6 min read
How to apply glass veil on drywall joints: the 5 correct steps, the tools and the mistakes to avoid for a crack-free skim finish.
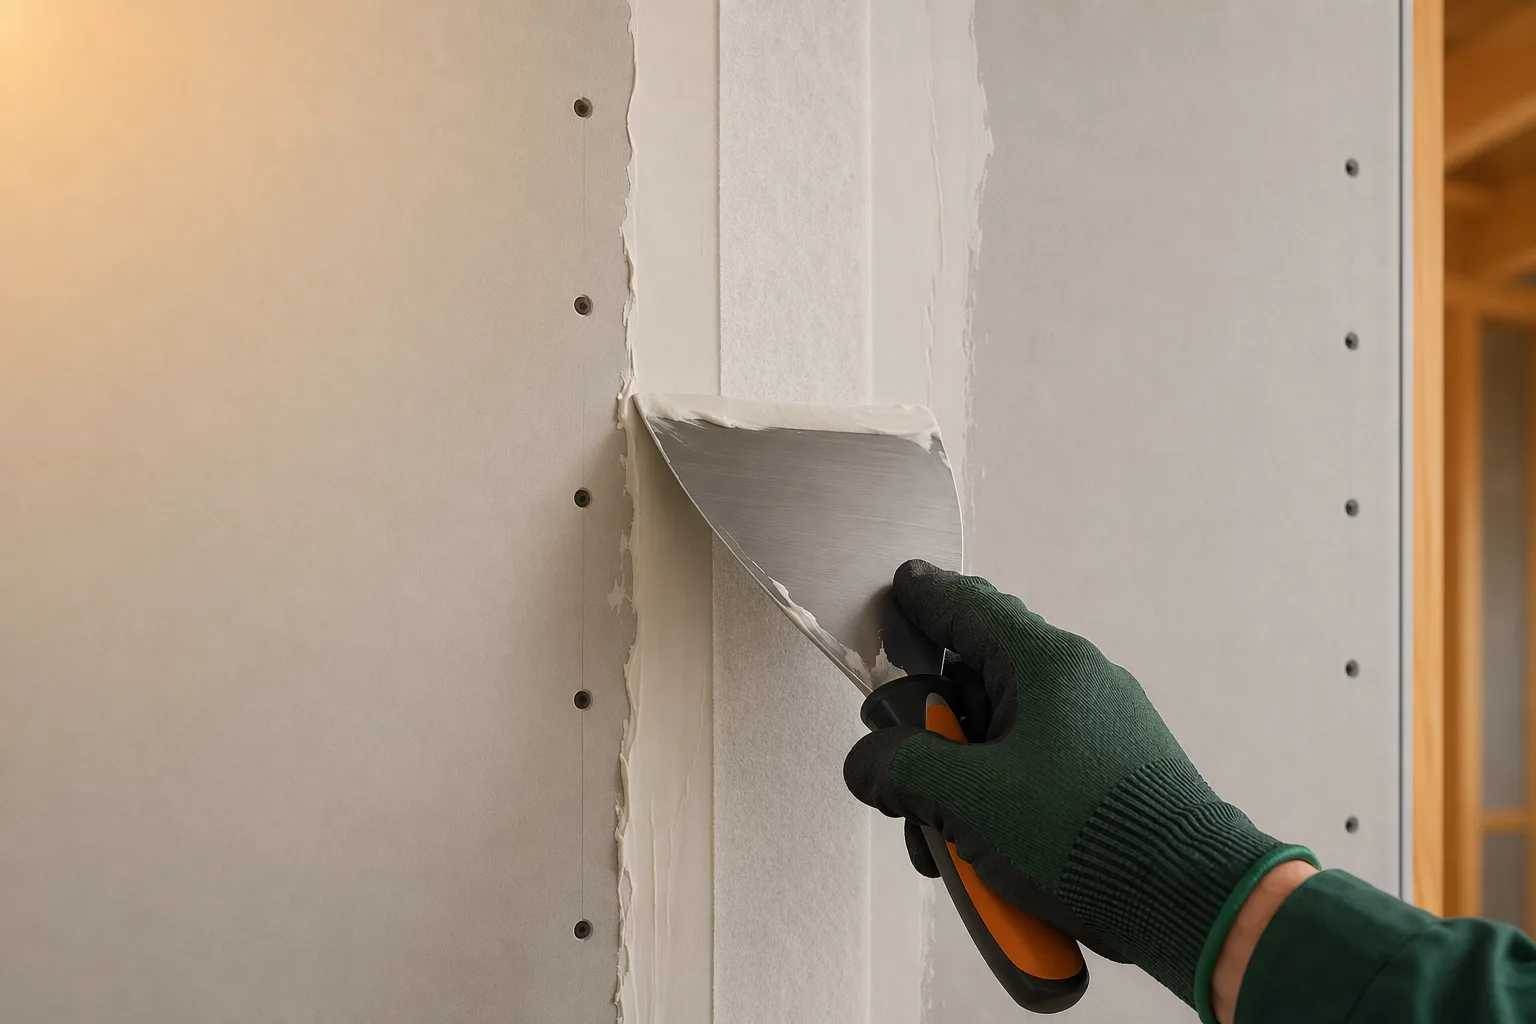
To apply glass veil on drywall joints you spread a first coat of compound along the gap, bed the veil tape (non-woven glass fibre web) into it pulling it tight with the knife, cover with a second coat and skim to finish once dry. It is the most reliable way to reinforce the joint and prevent cracks.
In this practical guide we look in detail at when to use glass veil, the correct 5 steps, the tools and materials needed and the mistakes to avoid for a crack-free skim.
If instead you first want to understand what the material is — grammage and roll sizes — start from the guide to fiberglass drywall tape (glass veil).
In short
- Application in 5 steps: compound → bed the tape tight → second coat → dry → sand and skim.
- Do not wet glass veil: it is bedded straight into the fresh compound.
- Tension and bed it without bubbles or creases: slack tape reinforces as little as no tape.
- Sand grit 120–150 and skim to the required Q1–Q4 level.
When to use glass veil (and when not)
Glass veil is particularly suited to butt (square-cut) joints — the cut sides of the boards, the patches and the junctions — where paper tape is harder to lay to a high standard. Thanks to its minimal thickness, it makes jointing simpler and leaves a flatter surface for the subsequent skim.
On factory-tapered joints (the recessed edges of the boards) many professionals use paper tape, which works well in the recess. On corners and patches glass veil is often the quicker choice, especially with a dispenser that keeps the tape tight and clean.
The key point: an un-reinforced joint sooner or later cracks, because two adjacent boards move slightly differently with temperature and humidity. The tape spreads those micro-movements over a wider band and prevents the classic crack along the joint.
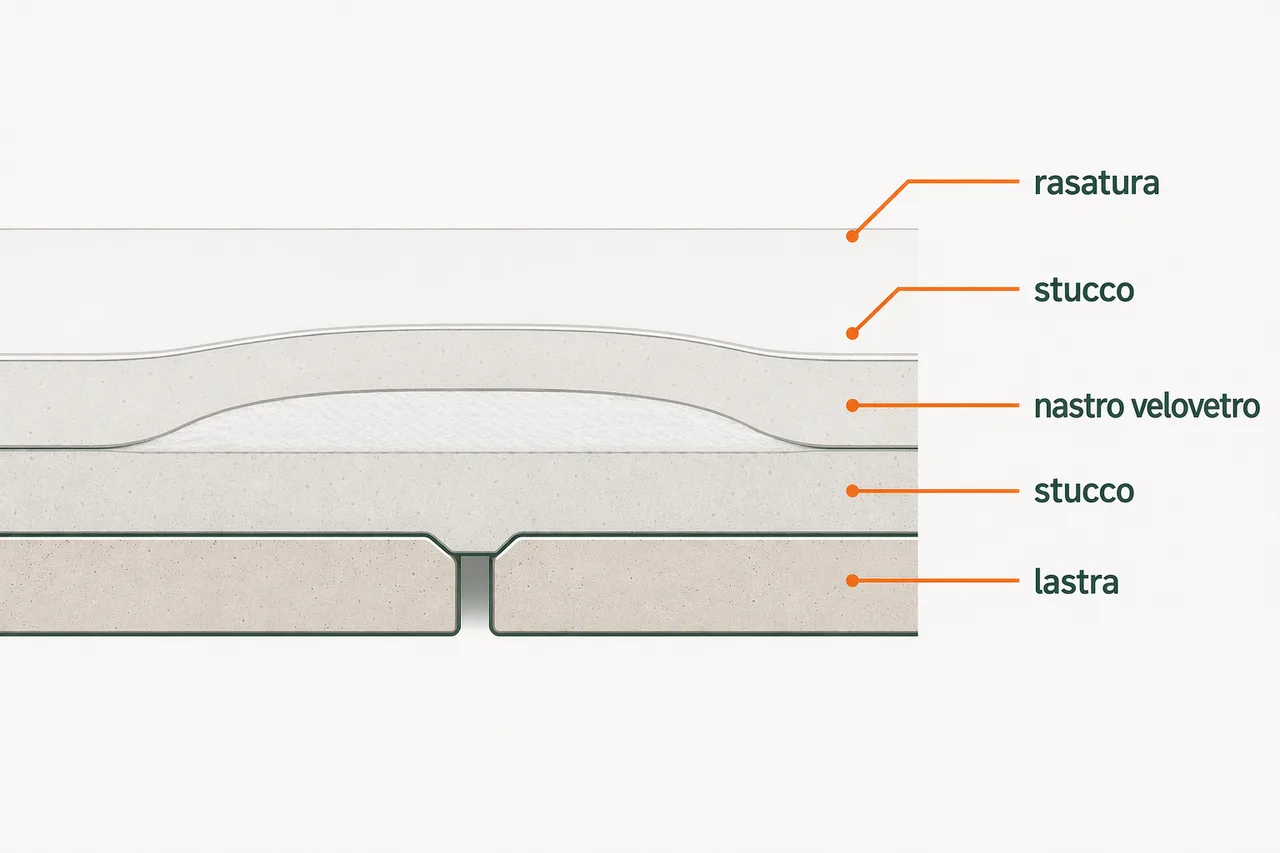
Tools and materials needed
- Joint compound: setting type for the first coat (stronger), finishing type for the cover and skim
- Glass veil tape (non-woven glass fibre web) — alternatively paper tape or mesh
- Taping knife 10-15 cm to bed the tape + float/wide knife for skimming
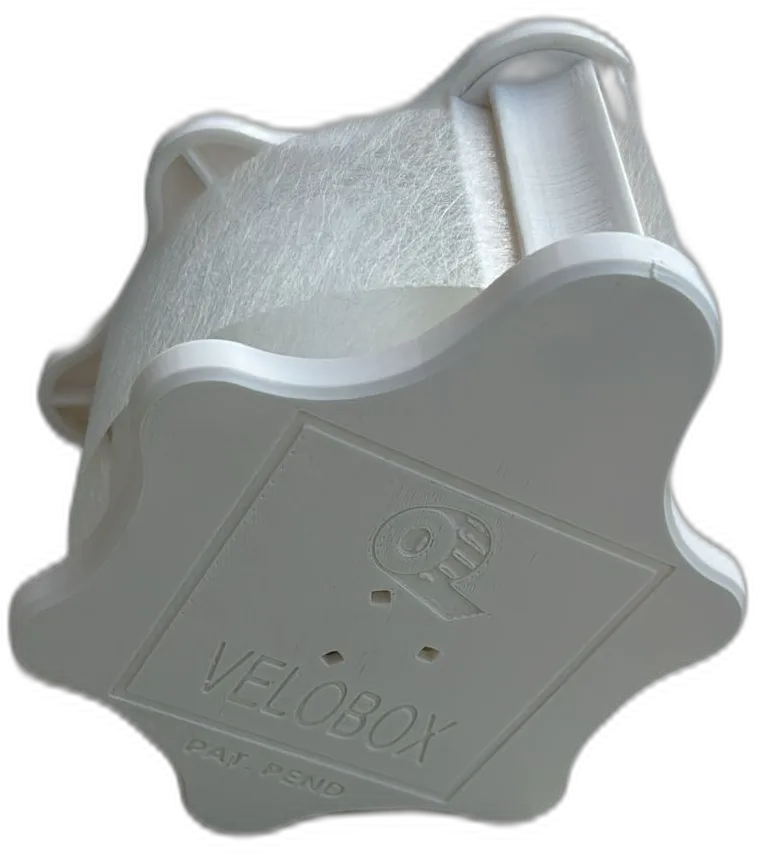
- A dispenser to unroll and cut the tape keeping it tight (e.g. VELOBOX)
- Sandpaper grit 120-150 or a sanding sponge
The 5 steps to apply glass veil
- Prepare the joint. Regular gap, clean and dust-free surface. On butt joints cleanliness is decisive: debris and dust stop the compound from bonding.
- Spread the first coat of compound (setting type) along the whole gap, even and generous enough to take the tape without air voids. Work with a creamy compound, not too dry.
- Lay the glass veil in the centre of the joint and bed it into the fresh compound, pulling it tight with the knife from top to bottom to remove bubbles and creases. Keep the tape taut: this is where joint quality is won.
- Cover with a second coat of compound (finishing type) over the tape to cover it completely, feathering the edges to zero. Let it dry 2-3 hours (longer in high humidity or low temperatures).
- Sand and skim with grit 120-150 to the required finishing level. Dust off before painting.
The finishing levels Q1–Q4 define how refined the surface must be: from simply filling the joint (Q1) to the smooth finish ready for raking light (Q4). See the drywall finishing levels. A clean glass-veil application is the base for reaching them.
Glass veil, mesh or paper: which to choose
| Material | Strengths | When to use it |
|---|---|---|
| Glass veil (non-woven glass fibre) | Minimal thickness, smoother finish, strong | Butt/square-cut joints, quality finishes (Q3–Q4) |
| Fibreglass mesh (self-adhesive) | Fast to lay, good strength | Quick patches where finish is not critical |
| Paper tape | Cheap, classic | Factory-tapered joints |
← scorri per vedere tutto →
The choice depends on the joint type and the finishing level: for a smooth, quality surface on butt joints, glass veil is often the cleanest route. The full comparison is in the guide glass veil, paper tape or mesh: which one to use.
Corners, corner beads and patches
On external corners you generally use corner beads (metal or PVC with mesh), but on internal corners and patches glass veil works well: fold the tape into the corner and bed it into the compound as on a flat joint. On T-junctions between longitudinal and transverse joints, slightly overlap the tapes so no spot is left uncovered.
The most common mistakes
- Not enough compound under the tape → air bubbles and de-bonding over time.
- Slack tape → creases that show after skimming.
- Skimming over compound that is not dry → shrinkage cracks.
- Covering coat too thin → the tape “prints” and shows in raking light.
Speeding up the application
The bottleneck is not the material, it is the consistency of the motion: unroll, tension, cut, repeat for tens of metres of joint. That is exactly the problem VELOBOX was born to solve — the dispenser that feeds glass veil (and also paper tape and mesh) with a single hand, keeping constant tension and a clean integrated cut.
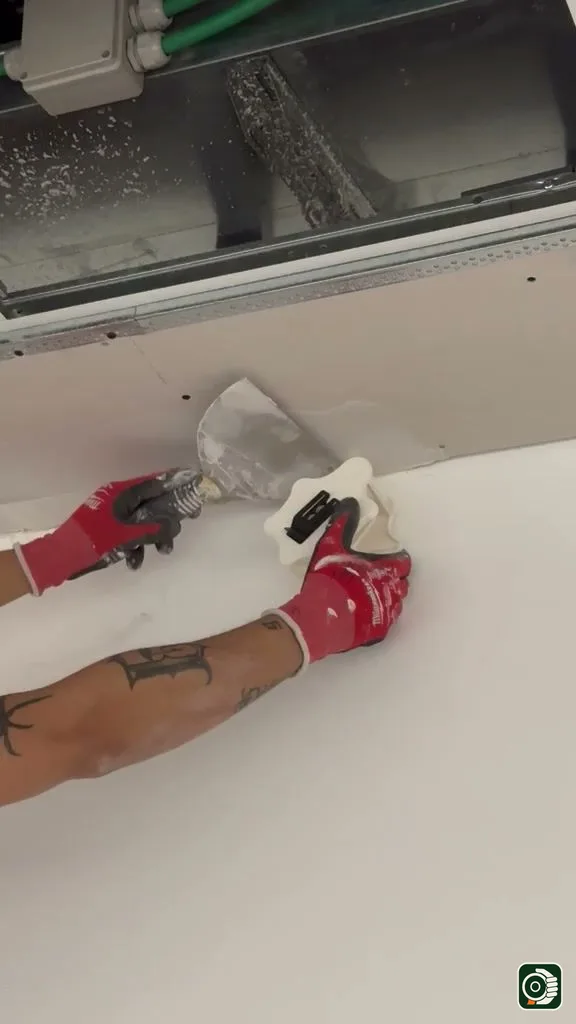
See also the step-by-step VELOBOX instructions with the three adapters for glass veil, paper tape and mesh.
Frequently asked questions
Do you wet glass veil before applying it? No. Unlike paper tape, glass fibre veil is not dampened: it is bedded straight into the fresh compound.
Self-adhesive glass veil or bedded into compound? Both versions exist. The bedded one gives the strongest joint and a smoother surface for skimming; the self-adhesive one is faster but leaves a slight thickness.
How many coats of compound go over glass veil? At least two: the bed the tape is embedded in and a second covering coat feathered to zero. For high finishes (Q3-Q4) a third pass is added after sanding.
How much glass veil per metre of joint? About 1 metre of tape for every linear metre of joint, plus a small margin for junctions and cuts.
Why does a joint crack even after taping? Almost always because the joint was not reinforced or the tape was poorly bedded, or because skimming was done over compound that was not dry. Well-laid glass veil prevents cracking.
Want to try VELOBOX first? Join the waitlist.
Related articles
- Fiberglass drywall tape (glass veil): what it is, weight and sizes What fiberglass drywall tape (glass veil) is: a non-woven glass fibre web that reinforces drywall joints. Weight, width, roll sizes and how to apply it.
- Glass veil, paper tape or mesh: which drywall joint tape to use Glass veil, paper tape or fibreglass mesh? A practical comparison of drywall joint tapes: pros, cons and which one to use where.
- Tools to apply glass veil: by hand, banjo or dispenser Which tool do you need to apply glass veil on drywall? A practical comparison of hand method, banjo, mesh applicators and a belt dispenser.
Apply the tape faster with VELOBOX
Join the waitlistAre you a reseller or distributor? Discover the dealer programme →